Asian-inspired Salad Excitement

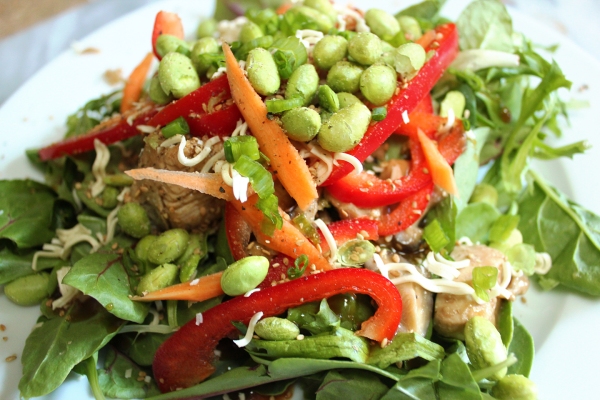
Asian Inspired Salad ExcitementIt’s hot. Boy, it’s hot — maybe too hot to even contemplate eating. But if you do have an appetite of any sort, this Asian-inspired dinner salad might be just what’s needed, and you don’t have to turn on the oven.

I wanted to make something that was as chock-full of textures as it was of flavors. There’s crunchy, crispy, and soft elements — and everything in between. It’s also a salad that’s open to substitutions, so don’t feel that you have to be married to the idea of roasted edamame if you can’t find any at your local grocery store. The ones I used are displayed by the cash registers as snack options at our local food co-op.

Serve dinner with a nice, cold Sauvignon Blanc or Sake. If you’re planning on leftovers for the next night, store the ingredients separately and toss right before serving.

Asian-inspired Salad Excitement


Serves 4

1 pound chicken thighs, cubed
6 shiitake mushrooms, sliced
1 Tablespoon cooking oil
1 Tablespoon Hoisin sauce
1 teaspoon low-sodium soy sauce
1 medium carrot, shaved into thin slices
1 cup roasted edamame
1 red bell pepper, thinly sliced
4 cups baby greens
4 green onions, chopped
juice from one lime
a drizzle of teriyaki salad dressing

Heat a skillet over medium heat. Drizzle oil and coat the bottom of the pan. Add chicken, Hoisin, and soy sauce and cook until chicken just begins to brown. Add mushrooms and cook a bit longer, until the shiitakes soak up some of the sauce and become soft. Remove from heat and allow to cool.

Add all ingredients into a large bowl, drizzling everything with the lime juice and salad dressing. Toss everything together and serve right away. For even more crunch, crumble some ramen noodles on top.
Quick Veggie Burritos

Quick Veggie BurritosThere’s nothing quite as quick and delicious as stopping by the local taqueria and picking up a couple of burritos. While it may be easy, those quick calories can start adding up on your waistline while depleting your wallet — or at least, that’s been my experience.

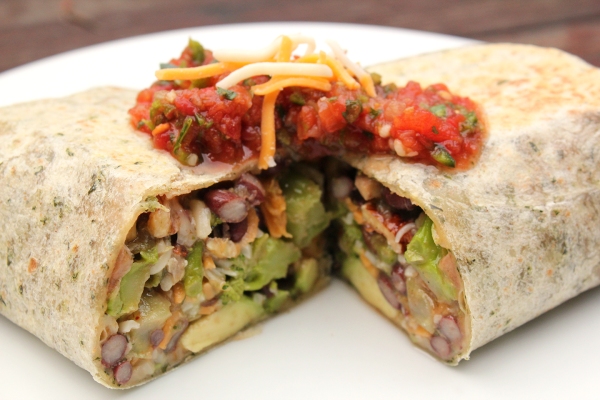
So, I decided to create something a bit healthier, though still pretty simple to make, and crafted a quick and tasty veggie burrito. I kept things inexpensive by using frozen veggies and prepped a few days of burrito fillings in advance so that I can spoon some mix into a tortilla and warm it slowly on the stove top soon after I get home from work. Not only are these almost as easy as dropping by the taqueria, they’re just as hearty, and they’re bursting with healthy vegetables. And seriously, these things are yummy!

Pair them with a nice ale or lager, or a white wine that can play nicely with all the different flavors, something like a Fumé Blanc.

Quick Veggie Burritos


Serves 4

high heat oil
garlic salt to taste
red pepper flakes to taste
1 cup chopped broccoli
1 cup mixed mushrooms
1 cup precooked butternut squash, cubed (I even got this frozen!)
4 Tablespoons canned tomatillos
1 cup canned black beans, drained and rinsed
2 Tablespoons sliced black olives
1 cup walnut pieces
handful of cheese (A combo of mozzarella and cheddar is nice. So is queso fresco.)
1 avocado, cubed
4 spinach wraps or other large tortillas

Preheat oven to 475 degrees F.
On a cookie sheet, scatter the broccoli, mushrooms, and squash in a single layer. Drizzle with oil and sprinkle with salt and pepper flakes. Cook until the veggies begin to brown, about ten minutes if they’re frozen, about five if they’re fresh.
Preheat a griddle or large pan over medium low heat.
Remove veggies from oven and put in a large bowl. Dump in the rest of the ingredients and stir together.
One by one, place tortillas on griddle and flip after a minute, leaving just long enough for the tortillas to be warmed and become more flexible.
Spoon approximately a cup of filling onto the middle-side of each tortilla. Fold tortilla and roll until a burrito is made.
Place on the griddle and cook on each side until lightly browned, about a couple minutes per side.
Serve with chips and salsa.

Stuffed Bell Peppers

stuffed green bell pepperIt’s pepper time in our neck of the woods. The summer’s presented us with a few heat waves, and while that might not be all that pleasant for us, it is for our local produce. When making a dinner of stuffed peppers, you may want to wait for a gap between hot days. Who wants to turn on the oven when it’s 100 degrees F outside? Certainly not me, but even on a warm day, this is a quick to prepare dinner, with a minimum of oven time.

What goes well with green bell peppers? I thought sausage mixed with rice pilaf and some blue cheese seemed like just the ticket. Then I paired dinner with a Cabernet Sauvignon, one with a bit of bell pepper characteristic but not too heavy on the tannins. It was a good match. ***One other thing, you’ll have stuffing left over. Save it for the next morning, scramble some eggs, mix it all together, and make into a frittata. Waste not, want not!

Stuffed Bell Peppers


Serves 2-4

4 green bell peppers, tops cut off and seeds and ribs removed
1 lb sausage
1 cup rice pilaf (I used a local company’s — though they’re offered all over — Wild Porcini Mushroom pilaf. You can also make your own.)
1/2 cup crumbled blue cheese

Preheat oven to 350 degrees F.
Warm a skillet over medium heat and cook sausage. Set aside.
Cook rice pilaf to package directions.
Stir together pilaf, sausage, and blue cheese. Stuff mixture into each pepper until nice and full. Set tops of peppers back onto the rest of the bell.
Place peppers onto a wire rack set into a baking pan and cook for 30 minutes. About 20 minutes in, take the pepper tops off and set onto the rack in the baking sheet so the stuffing browns a bit.
Remove pan from the oven and let sit about five minutes. Place peppers on plates and serve.

Veggie Wrap with Green Bean Fries

veggie wrapOh, fresh vegetables, you call to us during the winter months, promising crunch and flavor and energy…

Sometimes, I marvel at the world we live in, where we can get tasty, vitamin-packed veggies out of season. I started the week off on a less than healthy note, eating Chinese take-out for two days straight. I had neglected my usual grocery shopping the weekend before, so before take-out, I think we ate something like frozen cheese pizza. These things happen occasionally, but man was my body screaming for fresh food after that stint!

Wraps are always good for containing a great deal of vegetable goodness in an easy-to-eat format. To turn our veggie consumption up to 11, I made a side of green bean fries to go with it. We paired dinner with a Pinot Noir. There was just enough fruit in the wine to be a nice companion to the roasted red bell pepper and tomato, plus the lovely mineral characteristics were great with the mushroom.

Veggie Wraps with Green Bean Fries


Serves 2-4

2 spinach wraps or large tortillas
1 tomato, sliced thinly
4 Tablespoons of grated carrot
1/2 avocado, sliced
2 pieces of roasted red bell pepper, sliced
2 Tablespoons of thinly sliced spring onion
1/2 portobello mushroom cap, sliced
2 handfuls of baby spinach
choice of condiments (I used a drizzle of ranch dressing and a smear of stone ground mustard per wrap.)

2 cups of green beans
sprinkle of grated Parmesan
drizzle of extra virgin olive oil

Turn oven to 400 degrees F.
Bring a pot of water to a boil. Cook green beans until they turn bright green.
Drain in a colander. Toss with olive oil and Parmesan.
Spread onto a cookie sheet and cook until the beans — and Parmesan — just begin to brown, about as long as it will take you to assemble your wraps.
inside wrap
On two plates, place spinach wraps. Add condiments, and then layer up the vegetables, staying to just right of the middle of the wrap. Turn the plate so the right side is now the bottom. Fold in the sides of the wrap. Using your thumbs, fold the bottom of the wrap over the veggies and then slowly roll until the vegetables are fully encased, making sure the sides stay in as you go.
Cut the wrap in half, add the green bean fries, and eat right away.

Kimchi Fried Rice

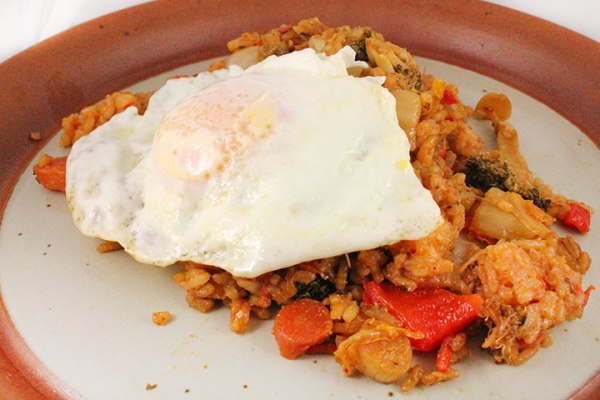
kimchi fried riceWe’re a home of many stir-fries. There are usually vegetables in the crisper as well as the freezer, and a stir-fry is both easy and nutritious. And it’s a quick dinner.

Sometimes, though, a little variety is desired.

I had a crisper full of vegetables that needed to be used. Their freshness was waning, and I hate to waste anything, so… stir-fry? Nah. Instead, I decided to incorporate kimchi into the dish to create a sour and savory meal

Kimchi seems to be growing in popularity in the States. BuzzFeed even did a list-of-things-you-can-do-with-it article. Like sauerkraut, it’s a fermented food, and it’s versatile in the dishes in which it can be served. Also like sauerkraut, it pairs nicely with Alsace varietals of wine.

I paired dinner with a bottle of Corvidae Ravenna 2012 Riesling. Not only is this an awesome wine, because, raven – Charles and I are big corvid fans – it’s really nice. It was a spot on pairing – the Riesling cut through the richness of the egg while making the kimchi fried rice almost creamy and balancing the spice from the Sriracha. It was lovely.

Kimchi Fried Rice with Egg


Serves 4

Hot Pepper Sesame Oil
1 cup white rice, cooked
1 jar of kimchi, drained well
2 cups mixed vegetables
3 cloves of garlic, chopped
1-2 Tablespoons Sriracha
1-2 Tablespoons low-sodium soy sauce
4 eggs, cooked how you like them (Charles is a scrambled egg kind-of guy. I like mine over-easy.)

Warm a skillet or wok over medium-high heat. Drizzle in sesame oil, just enough to coat the pan. Toss in rice and stir for a minute. Add kimchi and sauté until mixed well and warmed-through.
Remove rice mixture and set aside.
Add a bit more oil to the pan. Toss in vegetables, garlic, Sriracha, and soy sauce and sauté until vegetables are tender.
Turn heat to low and mix the kimchi rice with the vegetables.
While the mixture warms and the flavors incorporate, heat another pan over medium-low and cook eggs.
Divide the rice mixture evenly onto four plates, top with eggs, and serve.

Stock

There’s something so fulfilling about making chicken stock. I feel so good about not wasting anything, and then I have a freezer full of additions to my cooking.

I enjoy the whole process, too. Since I work full time, I do the majority of my cooking in the evenings. I’ll bake the chicken one night, let it rest, slice off a couple of pieces for dinner, and then cover it and place it in the refrigerator.

The next evening, I do what is so elegantly called, “picking the carcass.” Any of the usable meat is kept for sandwiches, salads, etc. The bones, skin, and other various bits gets thrown in a large stock pot along with whatever extra veggies are sitting around.

Now, there are die hard you-must-do-it-this-way-and-none-other stock makers out in the world. I feel making stock is about economizing, so I don’t buy extra ingredients for something that costs me nothing but extra time.

My grandma taught me that wasting food was a Cardinal sin – and really, why do it? That said, there were always some things that found their way into the compost bucket instead of our bellies, and it bothered me. Then I realized that there wasn’t any reason to compost all the onion ends, extra celery stalks, the going-woody carrots, past-its-prime garlic, and meat trimmings. If I kept them until I had enough for stock, there would be practically no waste.

In these days of using everything and saving as many pennies as possible, keeping a corner of my freezer reserved for unused produce just makes sense. I now have a couple of one gallon, glass jars with screw on lids into which I throw all of my extra produce pieces. Once I’ve baked a chicken and have the carcass ready for simmering, I throw everything from those two jars into the stock pot along with the chicken.

Everything simmers slowly for hours. As foam gathers on the surface, it gets skimmed off, and after the concoction has reduced by about half, I turn off the flame and let it cool. Then the big pieces get removed with a slotted spoon. What’s left gets strained until just the clear stock remains. The stock gets poured into canning jars with a bit of air left at the top and are placed in the freezer for whenever they’re needed. It’s rare for me to not have stock in the house.

Finishing this task always leaves me feeling warm, fuzzy, and accomplished. Wouldn’t it be nice if everything was like that?

  • Recent Posts

  • Archives

  • Categories

  • Meta