Strawberry Spinach Salad

strawberry spinach saladToday’s post is a quick one, as every spare moment has been filled with busy work this week. I’ll be telling the whole tale on my other blog, but for now, why don’t we take a break and enjoy a superb salad?

There are a lot of strawberry spinach salads out there, and for good reason. They’re a wonderful mix of flavors, and they’re good for you, too. Mine has the protein upped a notch with the addition of pecans and thin slivers of Pecorino cheese. After a little drizzle of papaya poppy seed dressing and a glass of rosé, this salad was ready to be a sensational supper.

Strawberry Spinach Salad

  • Difficulty: super easy
  • Print

Serves 2

2 cups baby spinach
4-6 strawberries, sliced
1 Tablespoon coarsely chopped pecans
1 avocado, sliced into small pieces
2 Tablespoons thinly sliced Pecorino cheese
salad dressing (I used Annie’s Papaya Poppy Seed)

Arrange the spinach on two plates. Layer the other ingredients. Drizzle the dressing and serve right away.

Cream of Asparagus Soup

asparagus soup
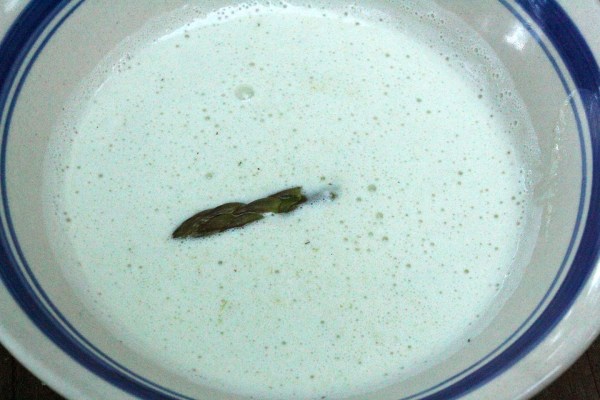
About a gabillion years ago (okay, maybe closer to 10) I worked in a coffee house. We baristas also served food, things like toasted bagels and cream cheese, blueberry granola, and soup. I fell in love with the cream of asparagus soup we served. It was an interpretation of the Moosewood Cookbook recipe and was made in large batches by my boss. This was my first introduction to, “Hey, vegetables can taste amazing as soup!” Before that, I was mostly about salads, and as a starving college student, I honestly saw most veggies as something above my income level.

But here we were. This soup was amazing, and I wanted more! I had graduated from college (again) and was working two jobs, one at the coffee shop and one at a grocery store. Not only was I able to afford creating something I considered fancy, I worked at a place where I could get part of it for free. The perks of working in grocery mean that you never starve. Keep that in mind, college students! I got a bunch of asparagus that was too old and ugly for the buying public, as well as an onion that had seen better days, and was on my way to making my first batch. Full disclosure — this soup was part of the first meal I ever made for Charles, and my first attempt at making it, so it has a very special place in my cook’s heart.

These days, I only work in grocery, and my position is a bit higher up the ladder. The coffee shop, though I still miss being a barista, is long gone. While the shop may be a thing of the past, I continue to think this soup is all that. It’s tasty and filling, and it’s a great first course or even a good meal, depending on how hungry you are. Serve it with a Sauvignon Blanc, though in my opinion, it’s best to stay away from the gooseberry characteristics of a New Zealand style. Oh, and even though I no longer take advantage of the free for staff as often as I used to, that doesn’t mean I’m not still frugal. This batch was made with the leftover asparagus after my naan pizza creation. The best way to save money when buying food is to eat all of it.

Cream of Asparagus


Serves 4-6

2 cups stock
1 onion, chopped
6 Tablespoons of butter
6 Tablespoons of flour
1 teaspoon dill weed
1 bunch of fresh asparagus, chopped
4 cups milk
1 teaspoon salt
pinch of white pepper

In a pot over medium heat, cook asparagus with onions and butter.
When the onions are clear, about eight minutes or so, sprinkle in the flour.
Lower the heat to low and continue to cook for five to eight more minutes, stirring often.
Add stock, salt, dill, and white pepper and cook about ten more minutes or until thickened, stirring frequently.
Puree the mixture bit by bit with the milk in a blender or food processor. Blend until smooth.
Return soup to low heat until it begins to bubble.

Veggie Wrap with Green Bean Fries

veggie wrapOh, fresh vegetables, you call to us during the winter months, promising crunch and flavor and energy…

Sometimes, I marvel at the world we live in, where we can get tasty, vitamin-packed veggies out of season. I started the week off on a less than healthy note, eating Chinese take-out for two days straight. I had neglected my usual grocery shopping the weekend before, so before take-out, I think we ate something like frozen cheese pizza. These things happen occasionally, but man was my body screaming for fresh food after that stint!

Wraps are always good for containing a great deal of vegetable goodness in an easy-to-eat format. To turn our veggie consumption up to 11, I made a side of green bean fries to go with it. We paired dinner with a Pinot Noir. There was just enough fruit in the wine to be a nice companion to the roasted red bell pepper and tomato, plus the lovely mineral characteristics were great with the mushroom.

Veggie Wraps with Green Bean Fries


Serves 2-4

2 spinach wraps or large tortillas
1 tomato, sliced thinly
4 Tablespoons of grated carrot
1/2 avocado, sliced
2 pieces of roasted red bell pepper, sliced
2 Tablespoons of thinly sliced spring onion
1/2 portobello mushroom cap, sliced
2 handfuls of baby spinach
choice of condiments (I used a drizzle of ranch dressing and a smear of stone ground mustard per wrap.)

2 cups of green beans
sprinkle of grated Parmesan
drizzle of extra virgin olive oil

Turn oven to 400 degrees F.
Bring a pot of water to a boil. Cook green beans until they turn bright green.
Drain in a colander. Toss with olive oil and Parmesan.
Spread onto a cookie sheet and cook until the beans — and Parmesan — just begin to brown, about as long as it will take you to assemble your wraps.
inside wrap
On two plates, place spinach wraps. Add condiments, and then layer up the vegetables, staying to just right of the middle of the wrap. Turn the plate so the right side is now the bottom. Fold in the sides of the wrap. Using your thumbs, fold the bottom of the wrap over the veggies and then slowly roll until the vegetables are fully encased, making sure the sides stay in as you go.
Cut the wrap in half, add the green bean fries, and eat right away.

Fish Tacos

Fish TacosSometimes, there are healthier options, but I just don’t choose them. Such it is with fish tacos. I find them the most enjoyable when they’re beer battered and fried. I’ve had them grilled, and they’re tasty like that, but it’s just not what I think of when I’m craving fish tacos.

While frying foods isn’t the healthiest option, it should be pointed out that there are healthy aspects to this dish. 😉 Cabbage, avocados, salsa, white fish — these are good things, and I opted to use Greek yogurt instead of sour cream for the creamy cabbage taco topping. All this to say, there’s no harm in the occasional fried treat, as long as it’s just occasional.

Since my tilapia was beer battered, I paired dinner with a beer as well, Six Rivers Paradise Moon Coffee Porter. I used Anderson Valley Brewing Company’s Barney Flats Oatmeal Stout in the batter, so the Porter was a nice accompaniment.

Fish Tacos


Serves 2-4

1 tilapia filet
1 lime, cut in half
salt and pepper to taste
1 cup high heat sunflower oil
2/3 cup flour
8 ounces of beer
1 teaspoon garlic powder
4 corn tortillas
1 large avocado, peeled, pitted, and chopped
1/4 cup Greek yogurt or sour cream
2 Tablespoons chopped cilantro
1 Tablespoon chopped green onions
4 leaves of cabbage, chopped (savoy or Napa work well)

Put tilapia, juice from half the lime, and a pinch of salt and pepper in a plastic bag. Tie closed and shake contents. Place in refrigerator to marinate and “cook” (The acids from the lime will interact with the fish, rather like ceviche.) for about 30 minutes.
In a large skillet, heat oil over medium heat.
Prepare beer batter by mixing flour, beer, garlic powder, and a pinch of salt in a bowl until blended. It should be about the same consistency as cake batter. Tear fish into small pieces and submerge in the batter.
Carefully lay pieces in the skillet. There wasn’t quite enough oil in my skillet to submerge, so I cooked each side for about three minutes. You’ll know the fish is done when the batter has browned and turned crispy on the outside.
Lay fish on paper towels to soak up any extra oil.
One at a time, take the tortillas and submerge in the still hot oil and then flip over, cooking for about 30 seconds total. Remove to another paper towel to drain.
In a large bowl, add avocado, the juice from the other half of the lime, yogurt, cilantro, onions, and cabbage. Mix until cabbage is nicely coated.
Place fish inside each tortilla and cover with the creamy cabbage mixture. Fold tortillas in half, garnish with pickled carrots, jalapenos, and onions and add a dollop of salsa to the side.

Kimchi Fried Rice

kimchi fried riceWe’re a home of many stir-fries. There are usually vegetables in the crisper as well as the freezer, and a stir-fry is both easy and nutritious. And it’s a quick dinner.

Sometimes, though, a little variety is desired.

I had a crisper full of vegetables that needed to be used. Their freshness was waning, and I hate to waste anything, so… stir-fry? Nah. Instead, I decided to incorporate kimchi into the dish to create a sour and savory meal

Kimchi seems to be growing in popularity in the States. BuzzFeed even did a list-of-things-you-can-do-with-it article. Like sauerkraut, it’s a fermented food, and it’s versatile in the dishes in which it can be served. Also like sauerkraut, it pairs nicely with Alsace varietals of wine.

I paired dinner with a bottle of Corvidae Ravenna 2012 Riesling. Not only is this an awesome wine, because, raven – Charles and I are big corvid fans – it’s really nice. It was a spot on pairing – the Riesling cut through the richness of the egg while making the kimchi fried rice almost creamy and balancing the spice from the Sriracha. It was lovely.

Kimchi Fried Rice with Egg


Serves 4

Hot Pepper Sesame Oil
1 cup white rice, cooked
1 jar of kimchi, drained well
2 cups mixed vegetables
3 cloves of garlic, chopped
1-2 Tablespoons Sriracha
1-2 Tablespoons low-sodium soy sauce
4 eggs, cooked how you like them (Charles is a scrambled egg kind-of guy. I like mine over-easy.)

Warm a skillet or wok over medium-high heat. Drizzle in sesame oil, just enough to coat the pan. Toss in rice and stir for a minute. Add kimchi and sauté until mixed well and warmed-through.
Remove rice mixture and set aside.
Add a bit more oil to the pan. Toss in vegetables, garlic, Sriracha, and soy sauce and sauté until vegetables are tender.
Turn heat to low and mix the kimchi rice with the vegetables.
While the mixture warms and the flavors incorporate, heat another pan over medium-low and cook eggs.
Divide the rice mixture evenly onto four plates, top with eggs, and serve.

Baked Pasta with Veggie Crumbs

baked pastaThe words, “pasta bake” have been floating around my head for the past month. Pasta! Cheese! Creamy sauce! How could I go wrong?

While I wanted to make this Mediterranean casserole of gooeyness, it wasn’t until I saw a post on “veggie crumbs” on epicurious that my desire became a must-happen. I mean, it’s easy to find gluten-free pasta these days, if that’s what you need, but an extra serving of vegetables in the form of crumbs? You had me at food processor.

A pasta bake is also an amazing vehicle for vegetables of all sorts. I packed a head of broccoli, 4 cups of baby spinach, and 2 cups of mushrooms into mine, as well as an entire head of cauliflower for the crumbs. Sure, there was cheese in there too, but, vegetables! There were lots and lots of vegetables!

The mushies and light, creamy sauce meant a Pinot Noir was the pairing choice. I chose Husch Vineyards‘ 2010 Pinot. It was scrumptious with the food and amazing on its own.

Baked Pasta with Veggie Crumbs


Serves 6-8
1 package of noodles such as fusilli or rigatoni, cooked to package instructions
1 head of broccoli, chopped into small pieces
2 cups of mushrooms, cooked (I used a variety of mushies.)
4 cups of baby spinach
1/2 cup caramelized onions
1/2 cup roasted red bell peppers
1 1/2 cups of shredded mozzarella
25-32 ounce jar of creamy marinara sauce (I combined Alfredo I made from scratch with a jar of spicy marinara sauce — yum!)

1 head of cauliflower, romanesco, or broccoli, separated into florets
1/4 cup shredded Parmesan
drizzle of extra virgin olive oil

Preheat oven to 375 degrees F.
In a processor, toss in florets and Parmesan. Pulse until the the cauliflower is the same size of bread crumbs. Drizzle in a little bit of evoo, and pulse until everything is nicely coated.
On the stove top, mix all ingredients together (except cauliflower and Parmesan) in a large pot. Once the cheese begins to melt, turn off heat and run a spoon over the top of the pasta until it’s level. Sprinkle “crumbs” evenly over the top and cook for 22-25 minutes, until hot and bubbly.
Turn on broiler to high and cook about two minutes, until the crumbs have turned a golden brown.
Remove from heat and serve right away.

Kale and Chickpea Soup

Kale and chickpea soupI have one of those recipes that I go back to again and again. It’s one of those dishes that makes you feel better after eating it, and it’s chock full of good-for-you ingredients. You know, all that stuff you’re supposed to eat on a regular basis like kale and tomatoes and legumes.

Because it’s a soup, the flavors meld into a savory, sweet, and slightly earthy experience that’s even better the second day. The recipe was given to me by one of our local farmers, and then I changed it up a bit, i.e., I dumped a bunch of wine into the dish. The extra wine gives the soup an amazing tang, and you can use what’s leftover to drink with your meal. I mean — what a win-win! For the leftovers, I’d recommend pairing with a Sauvignon Blanc. The acidity and citrus flavors go really well with my favorite soup.

This recipe is going to be two-fold. The first recipe is the way I’ve been making it for years, and the second is what I did this past week — utilizing a crock pot so a delicious, wholesome soup was ready and waiting when I got back from my afternoon run.

Kale and Chickpea (Garbanzo Bean) Soup


serves 8

2 onions or shallots, diced small
1 1/2 teaspoons of fresh thyme or 1 teaspoon of dried
3-4 Tablespoons of olive oil
3 cloves of garlic, minced
¼ t. pepper flakes
4 large tomatoes, fresh
1 bay leaf
1 teaspoon salt
2 1/3 cup white wine
6 cups vegetable or chicken stock
1 bunch kale, stems removed, leaves torn small
1 ½ cups dry garbanzo beans, cooked, or two 15 oz. cans of chickpeas
Salt and pepper

If using dry chickpeas, soak overnight. Cook them in at least four cups of water for three hours until soft. Be sure not to put salt in until peas are fully cooked. Cook the onions and thyme in the olive oil over medium until soft. Increase the heat and add the garlic, pepper flakes, tomatoes, bay leaf, salt and 1/3 cup wine. Stew for 15 minutes. Add the cooked chickpeas and the 8 cups of liquid. Simmer for 20-30 minutes to let the peas absorb the flavors. Add the kale leaves and cook ten more minutes. Add salt and pepper to taste.

Slow Cooker Kale and Chickpea Soup

Slow Cooker Kale and Chickpea (Garbanzo Bean) Soup


serves 8

2 onions or shallots, diced small
1 1/2 teaspoons of fresh thyme or 1 teaspoon of dried
3 cloves of garlic, minced
¼ t. pepper flakes
4 large tomatoes, fresh
1 bay leaf
1 teaspoon salt
2 1/3 cup white wine
6 cups vegetable or chicken stock
1 bunch kale, stems removed, leaves torn small
Two 15 oz. cans of chickpeas
Salt and pepper to taste

Layer all ingredients into a slow cooker except the kale, salt, and pepper. Place onions and garlic on the bottom, followed by the tomatoes, and then the chickpeas. Sprinkle herbs over everything and pour liquids in. Turn the slow cooker on to low, and let it cook eight to nine hours. Put in the kale and continue to cook on the low setting for another 30 minutes. Add salt and pepper to taste, and serve.

A Chilled Soup for a Hot Day

Chilled Potato and Asparagus SoupThe West is really warming up. There are places already experiencing 100 degree F days, and it’s not even June!

It may be heating up, but that doesn’t mean the time for soup is over. There are tomato gazpachos, fruit soups, and more. Since it’s not so hot — yet — that no one even feels like eating, a heartier chilled soup seemed in order. Inspired by Cowgirl Creamery‘s amazing Spring Garlic and Asparagus Soup, I made a version that incorporated my seasonal farm share from Pennyroyal Farmstead. This thick, creamy, and decadent meal paired perfectly with a slightly creamy Sauvignon Blanc, Husch’s “The Press,” a secondary label they created for the 2012 vintage. 2012 was a wonderful year with an amazing yield. Its grassy, citrus nose and lemon custard in the glass paired — as I said before — perfectly with the asparagus and goat cheese in the soup.

Creamy Potato and Asparagus Chilled Soup


serves 4

1 small bulb of green garlic, chopped
1 tablespoon salted butter
1 large and 1 medium Yukon Gold potato, peeled and chopped
1 sweet yellow onion, chopped
3 cups chicken stock
approximately 1/2 cup crème fraîche
12 asparagus spears, chopped
1 cup Chive Flower Laychee (or you could use ricotta)
drizzle of extra virgin olive oil
pinch of salt
freshly ground black pepper

Over medium heat, melt butter in a soup pot. Toss in garlic, potatoes, and onion and stir. Cover with a lid and cook for about ten minutes, stirring occasionally, until potatoes are soft. Add stock and bring to a simmer. Continue to simmer for ten minutes. Turn off heat and stir in crème fraîche.
In a large bowl, create an ice bath with ice and water, setting a slightly smaller bowl inside.
In one cup increments, purée the soup in a food processor or blender. Pour into the bowl inside the ice bath. Place into the refrigerator and wait for soup to chill.
In the same soup pot, bring 4 cups of water to a boil. Throw in asparagus and cook until it becomes bright green but is still just a bit crunchy. Drain and dry in paper towels.
This is my favorite tip from Cowgirl Creamery — instead of blanching the asparagus, toss it with olive oil and the salt and pepper. The asparagus absorbs more flavor while it’s still warm. I found this to be quite true! Put asparagus in a container and place in the fridge until ready to add to the soup.
When soup is chilled, pour into four bowls. Stir in asparagus, reserving tips for garnish. Dollop in small spoonfuls of Laychee. Garnish with asparagus tips and serve.

Sort-of Oaxacan Tostadas

tostadasCinco de Mayo is right around the corner, and any excuse to make Mexican food is reason enough to do it. So… let’s make tostadas!

A good tostada needs a good salsa. While freshly homemade salsa is best, it’s April, so that’s not really feasible. Tomatillos aren’t yet in season. There are some good pre-made salsa options, and if you’re in a bit of a time crunch, that may be your best option even if you’re making this dish in August. I chose a variety I knew from experience had good flavor with a bit of heat. A caveat — this tostada recipe isn’t as authentic as something you’d find in a Mexican restaurant. It’s still really tasty, though.

This meal is medium-hot on the spicy factor — the perfect reason to pair it with beer. A lighter style is your best option, be it lager, wheat, or pale ale. I opted for Lost Coast’s Tangerine Wheat. Its sweetness and crispness complimented the fatty chorizo and tempered the heat from the green salsa and the meat.

Tostadas


makes 12

12 small corn tortillas
1 jar green salsa
1 avocado, chopped
2 Tablespoons cilantro, roughly chopped
1 pound chorizo, casings removed
6 ounces queso fresco

Preheat a pan over medium heat. Cook chorizo until browned on all sides, breaking into small chunks as you stir.
While chorizo is cooking, add salsa, cilantro, and avocado to a bowl and mix well.
Crumble queso fresco into another bowl and set aside.
Drain cooked chorizo onto a plate lined with lots of paper towels in order to soak up the extra grease. Set aside.
Heat your stove top grill over medium high heat.
Place six tortillas on the grill, turning every 30 seconds until they begin to brown and puff up. Sprinkle chorizo onto the top of each tortilla. Allow the meat to warm and the tortilla to crisp. Remove from heat and repeat the process with the other six tortillas.
Sprinkle each tostada with queso fresco and then drizzle with the salsa mixture.
Serve with your beer of choice and plenty of napkins.

Cheesy Tuna Muffins

cheesy tuna muffinsMy birthday is coming up, and it’s also the two year anniversary of Sapid Cellar Door, so I thought it would be fun to make one of my favorite childhood dishes to celebrate.

My mom would make me the dinner I requested for my birthday, and I always asked for one of two things – porcupine meatballs, or even more often, tuna muffins.

Man oh man, I loved those things! Even after moving out on my own, they were still my “special treat” meal. I’ve made these muffins a lot through the years, and as I created them last night, shaping the tops with a spoon, it was all still muscle memory. I didn’t really have to think about what I was doing. I just did it.

I paired these muffins of memory with my absolute favorite food wine, Gazela Rose. It’s a refreshing, lightly fruity wine with a lovely, mineral finish and hint of effervescence. Whenever I’m not quite sure what to pair with a meal, I grab this wine, and it never disappoints. Plus, it’s wonderful on a warm summer’s evening, sitting on the deck, watching the wildlife begin to stir. We always try to have a case of it on hand.

Cheesy Tuna Muffins


serves 6-8

2 cups cooked rice (I used jasmine white rice.)
1 cup cheddar cheese, shredded
15 ounces Albacore tuna
1 cup sliced black olives
1/4 cup chopped onion
1 Tablespoon dried parsley
1 teaspoon season salt (I used Spike.)
1 teaspoon dried dill
2 eggs
2 Tablespoons half and half

Preheat oven to 375 degrees F.
Grease two muffin pans.
Mix all ingredients together. Pack into the muffin pans, rounding the tops with a spoon to resemble muffin tops.
Bake for 20-25 minutes or until the outside of the muffins begins to brown.

I like to eat my tuna muffins with a squeeze of fresh lemon juice. A little drizzle of melted butter is also very nice.

  • Recent Posts

  • Archives

  • Categories

  • Meta