Paneer Salad

paneer saladIt seems like everyone in the western United States is talking about our current heat wave. Heck, even the BBC are posting about it. I guess I’ll add my voice. This cold ocean loving gal hates the heat. When it gets hot, my desire to cook plummets into the negatives.

It becomes salad season, but of course, always tweaking with recipes and enjoying the creation of something new, I sometimes just go with whatever strikes my fancy at the moment.

Not having a plan, and not having much of a drive to even eat, I decided to play with flavors as they popped into my head a couple of evenings ago. The heat wave may not have rolled over the area by that point, but believe me, I could feel the atmosphere readying itself. I decided to attempt to craft a salad around paneer and stone fruit. I don’t know where the inspiration came from, exactly, but it ended up being a tasty dinner for a couple of nights.

Paneer Salad

serves two

You’ll need:
2 nectarines
2 cups baby spinach
7 oz paneer
Garam Masala to taste
2 TB crème fraîche
1 TB Gewürztraminer vinegar

Warm up a grill or grill pan. Slice nectarines then sprinkle with Garam Masala. Grill nectarines, turning after a couple of minutes or when grill marks become brown. While nectarines cook, cut paneer into small squares and sprinkle with more Garam Masala. Remove nectarines from grill and replace with paneer, following the same steps as the fruit.

In a bowl, combine crème fraîche, Gewürztraminer vinegar, and a few more sprinkles of Garam Masala. Mix.

Fill two bowls with the baby spinach. Layer grilled nectarines and paneer on top and drizzle with the crème fraîche mixture. Serve while nectarines are still warm.

Sushi, How I Love Thee

sushiI’m sure many people could claim the same, but I’m a sushi junkie. I love the stuff — how it tastes, the springy sensations of nori as you grab a roll, how good you feel after eating it — what an absolutely amazing food!

I was given the gift of making-sushi-knowledge when I played host to a couple of friends of mine, Eryn and Ellen, while they waited on the availability of their new apartment. Eryn worked at a local sushi restaurant and taught me the ins and out of creating a fine roll. It was a great payment for letting them stay at my place. I definitely came out ahead!

The other day, I was walking by the fish case at work and spied some lovely spicy tuna, glistening on its bed of ice and knew that sushi dinner was in my immediate future. I purchased 3/4 of a pound, which made a LOT of rolls for the evening’s fare.

First, I cooked one cup of dried sushi rice. Once the water cooks off, the rice is sticky. That’s what you want. I then mixed in one Tablespoon of rice vinegar and one Tablespoon of sugar (I had dissolved the sugar into the vinegar ahead of time) to the rice using my fingers, making sure that the liquid was distributed thoroughly.

sushi startAfter rinsing my hands, I laid out my bamboo mat (similar to this) and placed a piece of nori onto it. Then I spread — with my fingers — an even strip of rice across the bottom of the nori and placed the tuna on top of that.

sushi rolls, uncutThen comes the hardest part — using the mat, slowly roll the nori onto itself. Once the rice and fish has been enclosed with a layer of the nori, lightly squeeze evenly across the whole roll, slowly rolling as you do so, until you have a tight, even roll with a bit of nori still waiting at the end. Dip your fingers in a small bowl filled with water and slide your fingers across that last bit of nori that hasn’t yet been rolled. That will stick the end piece to the rest of the roll. Continue this technique until all of your rice and fish has been used. It will take some practice to get nice, even rolls. Don’t despair! They still taste good, even if they look a bit funky. Keep trying until you get the hang of it. (As you can see, I’m still working on the centering-the-fish aspect.)

Cut sushiSince the amount of tuna ended up making quite a few rolls (six to be exact), I had some fun with it. I added some avocado to a couple of rolls, Larrupin Dill Sauce to one, green onions to some… the possibilities are endless. Be creative! It’s fun you get to eat, after all. Then it’s time to cut. Use a very sharp knife. I always do this next to the sink so that I can rinse my blade as often as needed. Since the rice is sticky, it will coat the blade quickly. Cut each piece the width of two fingers or so. If you like taller rolls, go for it. It’s your dinner, so do what makes you happy.

Serve with wasabi, soy sauce, and pickled ginger and enjoy how your belly happily buzzes after the meal.

Gluten-free Update

sliced breadIt’s been two months since I decided to go gluten-free. I have to say, it hasn’t been as difficult as I thought it was going to be. It’s forced me to pay more attention to ingredient lists and sometimes search for alternatives, but because of how mainstream gluten-free eating has become, there are a huge range of options.

One of the things that I made sure to do was to have a Celiac Disease before I had followed a gluten-free diet for an entire month. I’m grateful to say that I tested negative for Celiac, though I am wheat sensitive.

I accidentally consumed wheat twice over the past two months and purposely consumed it once. Each time, I experienced swelling in my joints and intense pain. I also experienced the classic symptoms of bloating and stomach pain. The consistent reactions that I was able to replicate indicate that the sensitivity isn’t in my head, especially since I had the same reactions when I unintentionally ate wheat.

What does this mean for the future? Well, I’ll continue to seek out alternatives and share the successes and failures here. With the local food season going into full swing, veggie-heavy meals will be on the menu most nights. It’s always exciting to be presented with new-to-me produce from my CSA and to develop recipes around them. It should be an interesting summer.

But for the next two weeks, I’m going to be gallivanting in the desert, consuming Tasty Bites and Tanka Bars — the staples of our camping meals, but not very exciting in terms of a food blog. As soon as I return from vacation, I’ll be back to blogging. Until then, try some new recipes and drink lots of good wine.

The Start of Local

Local ProduceThere hasn’t been much in terms of cooking in casa de Hannum over the last week and a half. I’ve been fighting a nasty bug.

That aside, it’s the beginning of our local produce season, when farmers begin to deliver truckloads of fresh, beautiful food to the store and farmers markets.

My favorite way of consuming spring goodies is to process them as minimally as possible, celebrating their tender flavors, either in a quick stir fry or gathered raw on a platter along with cheese, olives, and Blue Diamond’s pecan crackers for a savory, light supper.

Slow Cooker Pork Shoulder

slow cooker pork shoulderYou’re probably beginning to realize that while I occasionally enjoy creating a complicated meal, my stand-bys are simpler meals that have a few layers of flavor but are easy peasy to make. And I love my slow cooker. I have a small one that’s perfect for smaller meals as well as small roasts — even a chicken.

A couple of days ago, I found a pork shoulder in the freezer (that place is a constant source of surprise for me) and decided it needed to be dinner. After thawing overnight in the fridge, I slow cooked that bad boy until it was a tender, falling-off-the-bone flavor extravaganza and served it with some smashed potatoes.

Slow Cooker Pork Shoulder

One pork shoulder
1/2 cup red wine
1 teaspoon salt
1 cup of mixed sweet and hot peppers (I had a bag of pre-sliced sweet bells, jalapenos, etc. that were in the freezer. I recommend a 3 to 1 ratio of sweet to hot.)
2 cups sweet cherries

Throw it all in the slow cooker. Set on low, and go to work. It will be cooked and the flavors will be nicely incorporated by the time you get home. Serve with veggies, potatoes, etc. — whatever side speaks to you.

Any leftovers can be turned into pulled pork sandwiches. I used a gluten-free hamburger bun that I toasted on the grill with a little garlic butter before filling. I added a couple of dollops of Larrupin Red Sauce to the pork for a bit more sweetness and heat.

Thai Green Curry

Thai green curryI find curry to be an amazing comfort food. Maybe it’s because of the endorphins released by the spicy heat. Maybe it’s because the flavors meld so beautifully. Whatever the cause, when I’ve had a rough work week, nothing helps me wind down quite as well as a nice bowl of curry and a glass of slightly sweet Riesling.

This is a simple Thai curry recipe that requires a small amount of prep and a bit of waiting, but the sigh you exhale with the first spoonful is worth that bit of work. Bonus, the money you save by making it yourself means that you just might be able to purchase that pair of strappy sandals you’ve been eyeballing. Comfort food + retail therapy = fully recovered!

Thai Green Curry
serves 4

2 cups water
1 cup jasmine rice
1 Tablespoon cooking oil
2 teaspoons finely chopped Galangal (Thai) ginger
2 cups mixed vegetables
pinch of salt
1 block of tofu, cubed
3 Tablespoons Thai green curry paste
2 cans of organic coconut milk (Give those cans a good shake before opening them.)
2 Keffir lime leaves if available (We have a local farmer who sells them.)

Put rice and water in a pot over high heat. Once it begins to boil, turn heat down to low and simmer until water cooks off. Remove from heat, cover, and set aside if curry isn’t quite done. It’s rice. You probably know that already, but just in case I have any beginners, that’s how it’s done.

Cook veggies and ginger until they’re just beginning to soften up, toss in tofu and salt, and stir. Pour in the coconut milk, curry paste, and lime leaves. Stir. Cover and simmer for 20 minutes. Remove lime leaves.

In a nice, deep bowl, shovel in some rice, pour curry over the top, and serve. Take a sip of that slightly sweet Riesling. Inhale through your nose. Exhale through your mouth. Repeat until dinner is finished. Don’t you feel better?

Kelp Noodle Stir-fry

kelp noodle stir fryThere’s been a package of kelp noodles that we got as a sample quite some time ago that would stare at me sadly every time I opened the pantry door, wondering when I was going to get around to using it. Though I liked the idea behind the noodles, and I enjoy seaweed of many different sorts, it was difficult to feel inspired when gazing at a package of gelatinous-looking noodles surrounded by a nebulous liquid.

Yesterday though, yesterday, I spied some Lo Mein on the deli’s hot bar at work, and man it looked and smelled so good, and I couldn’t have it! So I decided it was time, time to give those doleful noodles a purpose in being. Frankly, now I’m wondering why it took me so long. I really enjoyed them. They were crispy and fun to bite. While they tried to ball up together, a little separating with a fork brought them into line again, and they picked up the flavors of the sauce. Plus, they were that healthy thing I’m always striving for, so that was a bonus.

stir fry ingredientsKelp Noodle Stir-fry with Peanut Sauce

1 package kelp noodles
.6 lb boneless, skinless chicken thighs, chopped into 1-inch pieces
small yellow onion, chopped
red bell pepper, sliced thinly
2 cloves of garlic, chopped
2 Tablespoons + 1 Tablespoon gluten-free Thai peanut sauce
1/4 cup peanuts, chopped
drizzle of gluten-free Tamari
drizzle of gluten-free Sriracha
1 Tablespoon toasted sesame oil

Heat up skillet on high heat. Add oil.
Drizzle 2 TB peanut sauce, Tamari, and Sriracha on chicken and mix until chicken is coated. Toss in peanuts then place in hot skillet. Once chicken has browned, add onion and bell pepper. Stir for about a minute then add the garlic. Turn down heat to medium.
While the skillet does its magic and turns raw into cooked, place kelp noodles in a colander and rinse in cold water, separating the glob into lovely strands of translucent noodles.
Once onions are soft, throw in noodles and 1 TB sauce, stirring until the noodles are coated and warmed enough to become more flexible. When they’re flexing like a ballerina on a barre, serve that concoction with a couple of napkins. Until you get the hang of it, eating those noodles is going to be messy.

The red bell peppers are a nice counterpoint to the heat created by the Sriracha and play nicely with the nuttiness of the sauce. And I’m sold on those noodles. I’m going to be picking up a couple more packages. They just won’t stick around long enough to stare glumly out at me from the pantry shelf. I’ve learned my lesson.

Gluten-free Pizza

Gluten free pizza slice I had been noticing for quite awhile that when I ate bread, my joints would ache, and it kept getting progressively worse. It didn’t matter if it was organic, sprouted wheat bread or crappy French rolls from Sysco. First my left wrist would swell, then my knuckles, and finally my right elbow. Then my whole body would begin to HURT, I’d stiffen up, and it would be hard to move. Such negative reinforcement made me switch to a gluten-free diet pretty quickly, and I started to read “Wheat Belly” to get some answers.

While most of my meals are whole foods — lots of vegetables, some meat, some rice — sometimes, I crave comfort food. I’ve been investigating alternatives to some of my favorites. Keep in mind, I find these processed alternatives to be treats, so they’re not a regular feature of my meals. But sometimes, you just gotta have a piece of pizza.

gluten free crust For my first venture into the gluten-free world of pizza crust, I decided to go store bought. I’ll probably make a crust the next time, but it was a pretty tasty option. The texture, being rice, was interesting, both crispy and chewy, but it made for a good dinner.

Here’s my process:

Ingredients:

Chevre, pepper jack (shredded), and small mozzarella balls
extra virgin olive oil
pesto
nitrite-free salami
orange bell pepper (sliced)
portobello mushroom cap (sliced)
basil leaves
roasted red pepper flakes
garlic powder
Roma tomato
pizza crust

Ready for the ovenPreheat oven to 500 degrees. (You’ll be turning it down a tad once you put the pizza in the oven.)

Brush top of crust with olive oil. Spread a nice layer of pesto to almost the very edge of the crust. Follow with the pepper jack, crumble on the Chevre, layer the salami, mushroom, and bell pepper on top of the cheese. Next, cover the pizza with basil leaves and sprinkle with the mozzarella balls. Shake with a generous amount of the pepper flakes and garlic powder, and then follow the instructions on the box for cooking temperature and time.

While pizza cooks, slice tomato thinly. Once pizza is finished, layer the tomato slices on top of the cheesy goodness, and chomp away.

A Candlelit Flight

matchbook
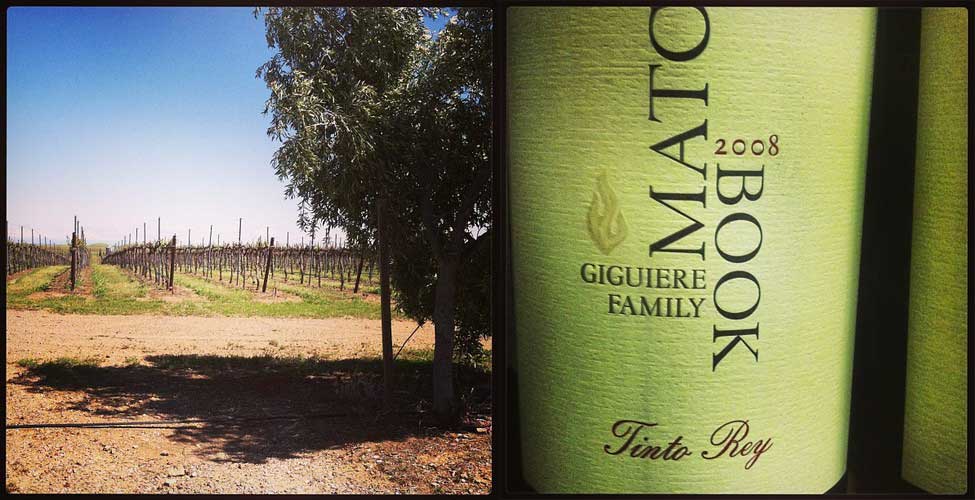
It was an incredibly blustery Monday. It was so windy, the power at Matchbook Winery had been blown out as easily as a small flame.

The darkness of the barrel room didn’t detract from the enjoyment of the day. It actually added an alluring ambiance as candlelight danced upon the five wine glasses lined up in front of each participant. We would each get the opportunity to enjoy two flights, exploring the process of how Matchbook’s staff settled on its blend, Tinto Rey.

The winery is nestled in Yolo County’s Dunnigan Hills. The native grasses, lupin, and wild mustard plants that were roiling in the wind that day, tossing like a choppy lake, made their presence known within the wines we sampled. They brought a subtle, unifying characteristic to the juice that was produced just outside of Zamora. Not everything we would sample was from the Dunnigan Hills, but those that were all held the same lovely, delicate flavors of the rolling hills.

The first flight included two Tempranillos, a Syrah, a Graciano, and the base blend derived from a combination of the four. The first Tempranillo had black pepper, spice, and cedar on the nose with chocolate and fruit on the front of the palate. The second Tempranillo, slightly older but also utilizing the native yeasts like the first, had a hint of cocoa and a touch of mint on the nose with a rounder palate that held vanilla and red fruit.

The 2010 Syrah’s nose was of black pepper and white sage. It was robust and structured with flavors of black cherry.

The fourth pour, a 2010 Graciano, had wild mustard, dill, and yeast on the nose with tart cherry, mocha, and a hint of musk nestled in its nice tannins.

The base blend, a combination of 49 percent Tempranillo, 36 percent Syrah, and 15 percent Graciano had chocolate, vanilla bean, and black cherry when sniffed and presented flavors of mocha and blueberry within a wine that had good structure and a nice finish.

Matchbook owner John Giguiere is a fifth generation farmer who started with RH Phillips and Toasted Head. After those successes, he decided to create a winery around the wines he enjoyed and started Matchbook.

“Everything is driven by our agriculture first,” he explained of his process.

Along with grapes, the farm is also growing olive trees and will soon host its own tasting room.

The second flight began with the last glass from the previous flight, the base blend. The winemakers explained that they were looking for ways to “bring it up a notch” and in so doing, brought out their “tool box” wines. They included a 2010 Tannat, the base blend plus Tannat, and a 2012 Cabernet Sauvignon. These would be combined to create the final blend, 49 percent Tempranillo, 27 percent Syrah, 15 percent Graciano, three percent Tannat, and six percent Cabernet Sauvignon.

The Tannat had a lot of tannins, a touch of bret, and leather character. With the base blend and the Tannat married, coffee and black currant presented themselves in the nose while the palate held a nice, chewy wine with red fruit and blueberries. The Cabbie was a fresh bowl of rising bread dough in the nose with nice tannins and a hint of green bell pepper in the glass.

A good bottle of wine results when the left and right hemispheres of the brain work together, creating an experience that utilizes all the senses.

“The art is knowing when not to use the science,” explained the winemaker.

When all of those lovely, though somewhat disconnected, parts were combined in just the right amounts, I was presented with brambleberry and cocoa aromas and a robust glass of red fruit, chocolate, spice, and black tea with wonderful tannins that will be quite the sought-after blend when it’s available in a year and a half’s time.

It was quite a charming day spent surrounded by wine barrels and nice people, everyone so excited by wine and its characteristics – bliss!
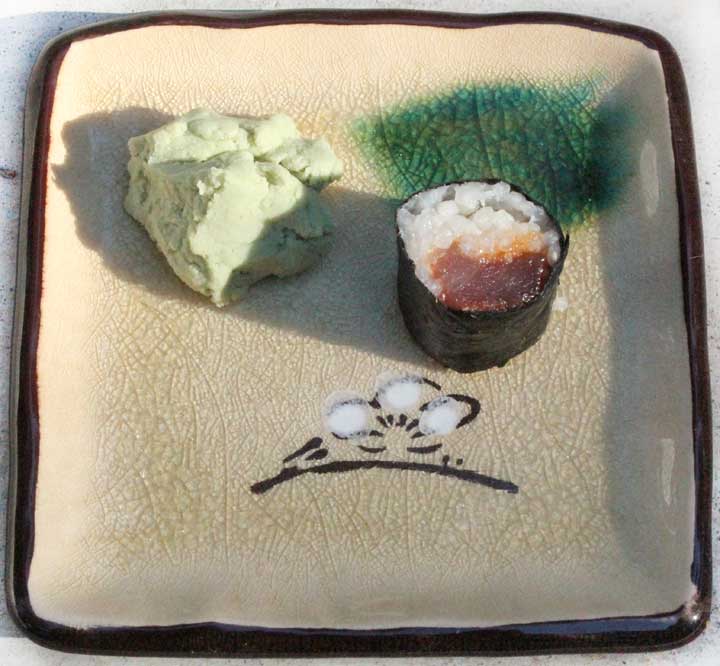
Grown Up Tuna Casserole

tuna casseroleFlipping through my ancient 4-H book the other day, I was reminded that I cooked a lot for my family when I was growing up. Then, like now, I obviously had something going on during the daytime and preferred easy-to-throw-together dinners that were filling and didn’t create a ton of dishes.

One of my much revisited dinners was tuna casserole. I tweaked it until I had a dish with more flavor than most of the traditional recipes but was still a crowd pleaser. (Always a must.)

Lately, I’ve been craving comfort food, and when I ran across a couple of packages of albacore tuna while rummaging around in the pantry, I knew what comfort food to focus on.

My only new considerations were that it needed to have a lot more vegetables in it than when I was concocting this dish as a child, and it needed to utilize the rather staggering collection of goat cheese I had amassed within the glowing cavern that is our refrigerator. The Frankensteinian creation that resulted was pretty tasty, but I think it could stand a bit more tweaking. Feel free to change the list of ingredients to what most appeals to your taste buds.

Grown Up Tuna Casserole

1 yellow onion, chopped
3 cloves of garlic, crushed and chopped
16 oz whole wheat shell pasta
1 Tablespoon ghee
4 fire roasted peppers in oil, chopped
2.4 oz jar of capers, drained
pinch of dried dill
2 cups baby spinach
1 bunch Italian parsley, chopped
24 oz organic cream of mushroom soup
10 oz organic mixed mushrooms
salt & pepper to taste
6 oz albacore tuna
2 cups cheese (I used a combination of goat cheeses: drunken goat, capra bianca, and laychee)
Italian Herb Panko

Preheat oven to 350 degrees F.

Put a pot of water on to boil. Cook pasta to package directions.

While waiting for water to boil, saute onion and garlic in a medium pan with the ghee until onions are translucent and beginning to brown. Lower heat and add peppers and capers. Stir until everything has warmed through and flavors have had a chance to commingle. Transfer to a bowl and set aside.

In the same pan, cook the mushrooms until tender, but not to the point that all moisture has evaporated from the pan.

Once pasta has cooked, dump all of the ingredients into the pot, reserving a half cup of cheese. Stir everything together until cheese has melted. Sprinkle remaining cheese on top and follow with a layer of Panko.

Bake, covered, for 25 minutes. Remove lid and bake for ten more minutes. Remove from oven and let sit for five minutes before serving.

UPDATE
The following day, I added some smoked tuna to the leftovers. It was the perfect addition, helping all of the flavors to blend together just right. It was quite the Goldilocks moment.

  • Recent Posts

  • Archives

  • Categories

  • Meta